Silicone sealant tools, and the number that decides each one
A reseal needs a gun, the right nozzle, tape, a smoothing tool and something to get the old bead out. What each one is for, and the figures off the sealant maker's own data sheet that say how to use it.
By The Damp GuyLast updated
The short version
You need five things: a standard sealant gun, a nozzle with an opening slightly larger than the gap, masking tape, a smoothing tool and something to cut the old silicone out. A basic skeleton gun is enough, because the data sheet asks for a standard sealant gun and nothing more. The tool most people treat as optional is the one the sealant makers say gives the bond: smoothing the bead down, within 10 to 15 minutes, is what presses it onto both sides of the joint. Every figure below comes off the data sheet of a named bathroom silicone.
The kit, and the number that decides each piece
Seven things for the job. The figures are the sealant makers' own, and each row names whose they are.
| Tool | What it does | The number that decides it | Source |
|---|---|---|---|
| Sealant gun | Pushes the sealant out of the cartridge at an even rate | A standard sealant gun. The Cox Easiflow skeleton gun is listed at a 7:1 trigger ratio, for 310 ml and 400 ml cartridges | Everflex 500 Bath & Sanitary Silicone data sheet; Cox Easiflow skeleton gun listing (Selco) |
| Nozzle | Sets the size of the bead | Opening slightly larger than the gap. The joint itself 5 to 25 mm wide | Everflex 500 Bath & Sanitary Silicone data sheet |
| Backer rod or foam | Fills a deep gap so the sealant is not too thick | Sealant depth no more than half the joint width | Everflex 500 Bath & Sanitary Silicone data sheet |
| Masking tape | Gives two straight edges | Peel it off within 5 minutes of applying | Everflex 500 Bath & Sanitary Silicone data sheet |
| Smoothing tool | Presses the bead into the joint so it bonds | Within 10 minutes (Everflex 500) or 15 minutes (Sika Forever), wetted with soapy water | Everflex 500 Bath & Sanitary Silicone data sheet; Sika Forever data sheet |
| White spirit and a cloth | Cleans off sealant that has not cured | White spirit for uncured sealant. Cured sealant needs a silicone remover | Everflex 500 Bath & Sanitary Silicone data sheet |
| Remover tool or scraper | Gets the old bead out first | Old sealant removed before the new goes on, onto a clean, dry surface | Everflex 500 Bath & Sanitary Silicone data sheet |
Two data sheets carry most of this: the Everflex 500 Bath and Sanitary Silicone sheet and the Sika Forever sheet, both from Sika. Other bathroom silicones publish their own, and the figures differ a little from product to product. The one on your cartridge is the one to follow, so look it up before you start.
The gun: a standard one does the job
The number printed on a gun's box is its ratio, and for silicone a bigger one is not better.
The ratio is how much push the plunger gets for each squeeze of your hand. A basic skeleton gun, the open frame kind, sits low: the Cox Easiflow skeleton gun is listed at a 7:1 trigger ratio and takes 310 ml and 400 ml cartridges. A heavy-duty gun goes much higher: the Cox PowerFlow HP is listed at 18:1, with up to 3.5 kN of thrust.
That extra force is for thick stuff. Toolstation describes a mastic gun as built for thicker materials like mastics and adhesives. Silicone isn't one of those, and the Everflex 500 sheet asks for nothing more than a standard sealant gun, with even pressure on the trigger and the gun held at a constant angle.
A tradesman on the Screwfix forum explains the catch better than any listing: "Heavy duty guns work great but the way they get the power is not good for silicone as your hand is pumping away with not much coming out, so flow control ain't as good as it could be." His answer was to carry a standard gun as well, because one squeeze gives a longer run. For a bath, that longer run is the steady bead you're after.
The feature worth paying a bit more for is the one that stops the drip. Silicone keeps creeping out of the nozzle after you let go of the trigger. Some guns have a pressure release to stop it: the Cox PowerFlow HP lists a switchable one that "helps prevent material run-on when engaged". Whichever gun you have, loading it and stopping the drip gets its own page.
The nozzle sets the bead, so match it to the gap
The maker's rule is one line: an opening slightly larger than the gap you're sealing.
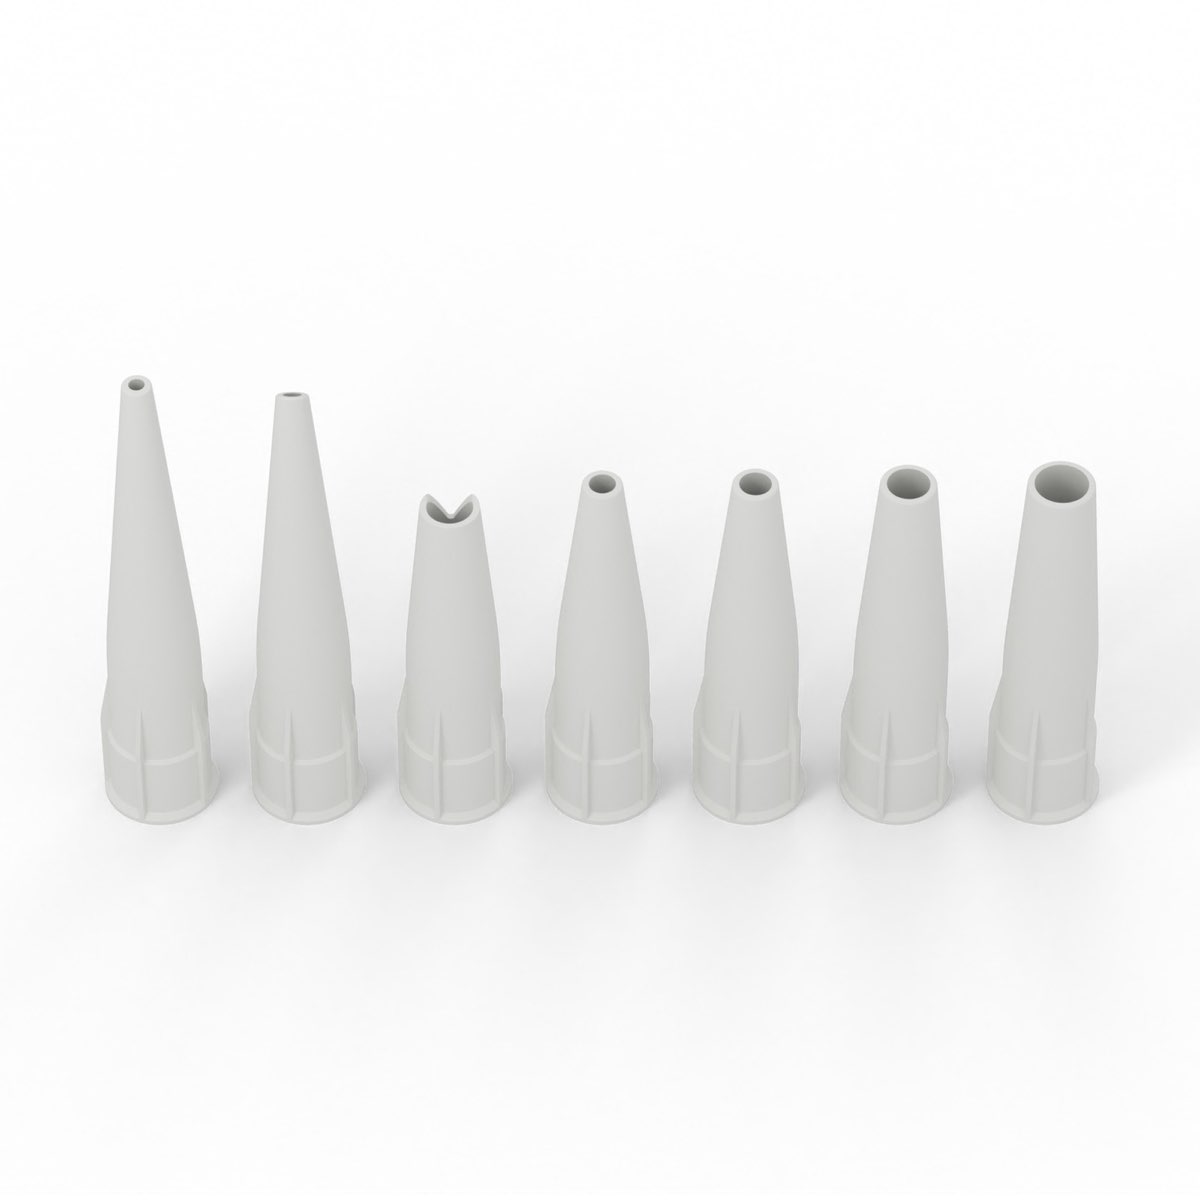
The Everflex 500 sheet says to cut the nozzle cleanly at 45 degrees, with an opening slightly larger than the gap. Too small and the bead doesn't fill the joint. Too big and you're scraping the excess off the tiles. The nozzle that comes with a cartridge gets cut once, so if that first cut is wrong you live with it for the whole tube.
The gap has limits as well. The same sheet puts the joint at 5 mm wide at the least and 25 mm at the most, with the sealant no deeper than half the joint's width. If the gap behind a bath or a shower tray is deep, a backer rod or expanding foam goes in first to bring the depth up. The sheet also wants the sealant stuck to two sides of the joint and not a third, because three-sided adhesion stops it flexing. Where a gap is outside those limits, the problem is the gap, and no nozzle fixes that.
How to cut, run and finish the bead itself is the job of the application page. This page is about having the right hole to do it with.
The smoothing tool is part of the bond
It's sold as a way to get a neat finish. The sealant makers describe it as the step that makes the seal stick.
The Everflex 500 sheet is plain about it: "To ensure a proper bond, always smooth the sealant down." Sika Forever says the same, and names the tool: smooth it with a smoothing tool within 15 minutes of applying. A bead that's only been laid on the joint is sitting there. Smoothing presses it onto both faces.
You have a window to do it, and it's short. Everflex 500 gives 10 minutes, Sika Forever 15. Each one lines up with the product's skin time, which is when the surface starts to set: 10 minutes at 20°C for the first, 15 to 20 minutes for the second. Run the whole length before you smooth any of it and the start may already be skinning.
A plastic smoothing tool has shaped edges for different joint sizes. UniBond describes its own as having "different finishing angles for wall & floor applications", and its 2in1 version puts a removal end on one side with two smoothing profiles on the other. You don't strictly need one. The Everflex 500 sheet asks only for a spatula or a piece of wood wetted with a soap and water solution. The soapy water is what stops the sealant sticking to whatever you smooth it with.
Masking tape is the other half of a neat line. Tape both sides of the joint, run and smooth the bead, then pull the tape. The Everflex 500 sheet says it has to come off within 5 minutes of applying. That's tight, so tape and seal one run at a time, not the whole bath at once.
Before and after: the old bead, the clean-up, the leftovers
New silicone goes onto a clean surface, not over the old. The Everflex 500 sheet says old sealant and mastic joints should be removed first, and the surfaces left clean, dry and dust free. A remover tool or a scraper gets the bulk out. Getting every last trace off is its own job, and if the old bead has gone black, read why mould grows into silicone before you put the new one in the same conditions.
Keep white spirit and a cloth to hand. The same sheet gives white spirit for sealant that hasn't cured. Once it has cured, it needs a silicone remover, so wipe up mistakes while they're still wet.
A reseal rarely uses a whole cartridge. A screw-on cap in place of the nozzle plugs the spout so the rest doesn't set in it, and keeping an opened tube usable has its own page.
The last thing on the list isn't a tool. Sika Forever says to let it cure for 24 hours before you use the bath or shower, and what speeds that up or slows it down is worth a read before you plan the job. Doing the whole reseal start to finish is covered step by step. If you would rather pay someone, what a reseal costs is worked out on its own page.
About this resource
The joint sizes, the nozzle rule, the smoothing and taping windows and the clean-up advice come from two manufacturer data sheets, Everflex 500 Bath and Sanitary Silicone (February 2018) and Sika Forever (June 2025), both linked in the sources at the foot of the page. The gun ratios are the listed figures for two Cox guns, named only to show what the numbers look like on a real product. The forum quote is one tradesman's view, given as his.
I haven't tested any of these tools, and nothing here is a ranking. A sealant's sheet is the authority for that sealant, so read yours. If water has already been getting past a failed seal, what that does to the floor below matters more than the tools. And if a new bead goes black again, that's a moisture question, not a tool one, which is the argument of the mould on walls page.
Common questions
Do you need a gun to use silicone sealant?
For a standard cartridge, yes. The sealant makers write their instructions around one: the Everflex 500 data sheet says to apply it using a standard sealant gun, with even pressure on the trigger and the gun held at a constant angle. A basic skeleton gun does that job.
Is a caulking gun the same as a silicone gun?
For a bath reseal, yes. Toolstation uses "sealant gun" as the general term for anything that dispenses silicone, acrylic or polyurethane, and a caulking gun is the same tool sold for caulk. The one that differs is a mastic gun, which is built for thicker materials like mastics and adhesives.
Can I use my finger to smooth silicone sealant?
Plenty of people do, wetted first, and it moves the bead. The data sheets name something else. Everflex 500 asks for a spatula or a piece of wood wetted with a soap and water solution, and Sika Forever asks for a smoothing tool. Whatever you use, the job is the same: press the bead into the joint, because both sheets say that is what gives a proper bond.
Should I use masking tape when applying silicone sealant?
It's optional, and it gives the neatest edges. The Everflex 500 sheet says an improved appearance comes from taping both sides of the joint, and that the tape has to come off within 5 minutes of applying.
How long should you leave silicone before tooling it?
You don't leave it. You tool it straight away, inside the maker's window. Everflex 500 says smooth it down within 10 minutes, and Sika Forever says within 15 minutes of applying. Each window lines up with that product's skin time, which is when the surface starts to set.
Sources (9)
- Everbuild (Sika) product data sheet, Everflex 500 Bath & Sanitary Silicone, February 2018 v01.01, read 6 October 2026
- Sika product data sheet, Sika Forever, June 2025 v01.01, read 6 October 2026
- Selco listing, Geocel Cox Easiflow 10 inch skeleton gun, read 6 October 2026
- Gluegun.com listing, Cox PowerFlow HP 310, read 6 October 2026
- Toolstation, sealant guns category, read 6 October 2026
- UniBond product page, Sealant Smoother Tool, read 6 October 2026
- UniBond product page, 2in1 Sealant Remover and Smoother Tool, read 6 October 2026
- Screwfix Community thread "Caulk guns", read 6 October 2026
- MyJobQuote Q&A, best way to apply silicone, read 6 October 2026