How to reseal a bath, and keep the water out of the ceiling below
The job takes an afternoon. What decides whether it lasts is the water in the bath, and the bath and sealant makers' own instructions say how much and for how long. Plus how to tell whether the seal is really what is leaking.
By The Damp GuyLast updated
The short version
Get every scrap of the old sealant out. Clean the edge with methylated spirits and let it dry. Put water in the bath, run one bead of sanitary silicone, smooth it within a few minutes, and leave the water in until the sealant has cured. That last step is where most reseals go wrong. The makers say until it has cured, not overnight, and the data sheets put the cure at about 2 to 3 mm a day. If there is a stain on the ceiling below, check the waste before you blame the seal. Then reseal anyway, because home insurance commonly excludes damage from failed sealant.
Why a bath seal lets go
Four reasons, and every one of them is written into a sealant maker's data sheet.
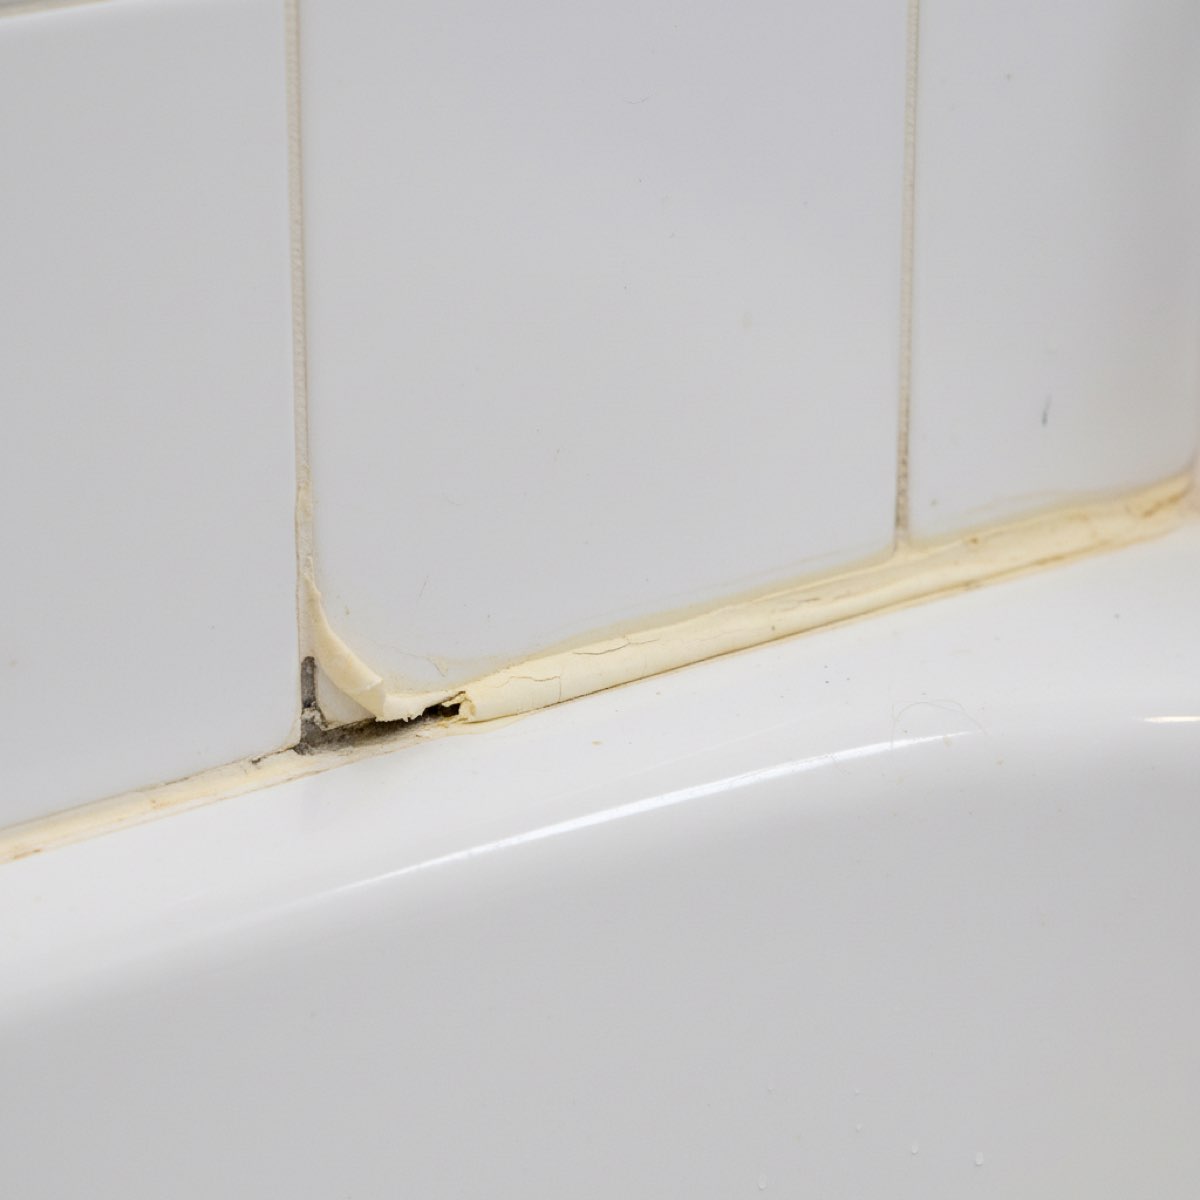
The bath moves. A bath moves between empty and full, and the bead is the thing that has to stretch with it. Bostik tells you to seal a bath half full for exactly that reason, and Everbuild says the same for plastic and acrylic baths: it gives the "mid point" of the movement the joint will see. Seal it empty and the bead starts life at one end of that movement instead of the middle.
It never stuck properly. Dow's data sheet wants the surface "clean, dry, sound and grease-free", wiped with methylated spirits and dried. Duravit's fitting instructions warn of water damage from silicone that does not adhere, and say not every standard silicone sticks to every bath material. Dow recommends an adhesion test on an acrylic bath. And Soudal says the soapy water people smooth with stops the sealant sticking to any surface it touches, so you dip the tool, never the joint.
The old sealant was left in. Sika's sheet says old sealant and mastic joints should be removed before application. A new bead on top of an old one is only as good as the old one underneath it. Getting old silicone off cleanly is a job of its own.
The joint is the wrong shape. Sika says the bead should stick to two surfaces only, because "three sided adhesion will impair flexibility". A gap that is too wide or too deep for silicone is covered further down.
Black spots in a bead that is still stuck down are a different problem, and mould in the silicone has its own page.
The water in the bath, in the makers' own words
Every how-to says fill the bath. Here is what the people who make the baths and the sealant actually write.
| Instructions | Whose | While sealing | Until |
|---|---|---|---|
| Heritage Bathrooms | bath maker, acrylic and cast iron fitted baths | Full of water | The sealant is completely dry |
| Kaldewei | bath maker, steel enamel | Weighed down | The joint is completely dry |
| Duravit | bath maker, alcove bath (North American edition) | Filled with water | The silicone has dried to its maker's instructions |
| Everbuild Forever White | sealant maker | Half full, for plastic and acrylic baths | Water stays in during the cure |
| Bostik SX Premium Sanitary Silicone | sealant maker | Half full | The sealant is fully cured |
| Ideal Standard | bath maker, acrylic shower bath | Says nothing about water | Not stated |
Sources: the fitting instructions of Heritage Bathrooms, Kaldewei, Duravit and Ideal Standard, and the Everbuild Forever White and Bostik SX data sheets, all read in October 2026 and linked at the foot of this page.
They disagree on how full. Heritage says full. Everbuild and Bostik say half full, and give the reason: half full is the middle of the bath's movement, so the bead cures at the middle and stretches both ways from there. If you still have your own bath's fitting instructions, follow those. If you do not, the sealant's data sheet is the next best thing, and on these two it is half.
They agree on how long, and it is the column nobody quotes. Not one of them gives a number of hours. They say until the sealant is dry, or fully cured. Everbuild's sheet puts the cure at about 2 to 3 mm in 24 hours and Bostik's at about 3 mm per 24 hours, both at 23 degrees. Dow's figures show it slowing down: 3 mm after one day, but only 5 mm after three.
So the "24 hours" on every how-to is an answer for a thin bead. A fat bead in a wide gap is still soft in the middle when the bath gets emptied, and the joint moves before it has set. Press the bead gently at the thickest point before you pull the plug. The full answer on timings, and what slows them, is in how long silicone takes to dry.
Is the seal actually your leak?
If there is a stain on the ceiling under the bathroom, rule out the waste before you reseal for it.
Heritage Bathrooms says what the seal is for in one line: it is there to "prevent water getting down the back of the bath". When it fails, that is where the water goes. Down behind the panel, onto the floor, and through to whatever is under it. A failed bath seal is one of the ways water gets into a ceiling without a single pipe leaking.
But it is not the only way, and the published insurance cases show both directions. In one ombudsman decision a bath kept leaking onto a ceiling after the waste trap and a waste pipe had been replaced, and the sealant was then found to need redoing. In another, the insurer put the damage down to failed sealant, and the plumber found the leak in a drainage pipe under the shower. In a third, a leak detection company reported that the seals "looked in good condition" while passing water.
So looking at the bead does not tell you. In one of those cases the insurer's expert flood tested the seals. You can do a rough version yourself. With the waste and the tap connections checked dry, run the shower against the sealed edge, then look under the bath panel and at the ceiling below. Water that turns up there with the waste dry points at the seal or the grout.
Two things to keep apart. Black mould spread across a bathroom ceiling is usually the room's own steam, which is a ventilation problem with its own fix. A stain on the ceiling of the room underneath is the one to trace. And if the floor under the bath feels soft, the timber may have been wet for a while. Read what wet rot is and is not before anybody sells you a treatment for it. A ceiling that is sagging is for someone to look at that day, not for a reseal.
Your home insurance has probably written this one out
Damage from a failed seal is a standard exclusion, and the Financial Ombudsman has called the wording fair.
| Decision | What got wet | What the policy excluded | Outcome |
|---|---|---|---|
| DRN-5275936, 14 March 2025 | Water going behind the back of the bath | "damage caused by a lack of or failure of sealant or grout" | Not upheld |
| DRN-5064862, 17 December 2024 | A ceiling, under a bath that still leaked after the waste trap was replaced | "loss or damage caused by failure or lack of sealant and/ or grout" | Not upheld |
| DRN-4550974, 19 February 2024 | Floor and beams under a shower tray, and the kitchen ceiling | "damage caused by failure, wear and tear or lack of grouting or sealant" | Not upheld |
| DRN-5184259, 4 April 2025 | A leak the insurer put down to sealant problems | "the failure or lack of grouting or sealant known to you or that you ought to have been aware of" | Not upheld |
| DRN-4358422, 25 October 2023 | Beams under a shower. The leak was a drainage pipe, not the seal | "loss or damage caused by sealant or grout failing to work properly" | Upheld |
Source: Financial Ombudsman Service final decisions, quoted from the policy wording each one sets out. Every one is free to read and linked at the foot of this page.
In another decision the ombudsman put it plainly: "Insurance policies often exclude cover for failure of or lack of sealant or grout, as it's a common cause of damage from water leaks." In the fourth row the ombudsman said the wording "is reasonably common in the insurance marketplace, and I think they're fair."
Read that fourth exclusion again. It covers sealant failure "known to you or that you ought to have been aware of". A bead you can see has come away from the bath is one you ought to be aware of. A reseal costs a cartridge and an afternoon. On wording like this, the ceiling below is yours to pay for. The one decision that went the homeowner's way went that way because the leak was not the seal at all, which is the other reason to find out what is leaking before you decide what to fix. Check your own policy's escape of water section for the words sealant and grout.
Resealing a bath, start to finish
The best way to reseal a bath is mostly preparation. The bead itself is the quick part.
- Check the bath first. If it rocks or drops when you step in, fix the support before you seal it, or the new bead takes the same movement the old one failed under. If water has been getting past, let the joint dry out.
- Get all the old sealant out. Every bit of it. How is in removing silicone sealant.
- Clean and dry the edge. Dow's sheet names methylated spirits for the bath and tile edge, then a dry, lint-free cloth.
- Mask both sides. Dow recommends taping the areas next to the joint to keep them clean and give a neat line.
- Put the water in. To your bath's own instructions if you have them, half full if you are going by the sealant sheets.
- Use a sanitary silicone. EN 15651-3 is the European standard for sanitary joint sealants, and the classification is printed on the data sheet. On an acrylic bath, Dow recommends an adhesion test. Which sealant to buy for a bath is its own page.
- Run one continuous bead. Measure the gap first and match the nozzle to it (the table below). The technique is in how to apply silicone sealant, and loading and handling the gun in how to use a silicone gun.
- Smooth it straight away. Dow and Bostik say tool it within 5 minutes, Everbuild within 15. Dip the tool in the soapy water, not the joint. Then pull the tape.
- Leave the water in until it has cured. Then empty the bath. Dow and Bostik give +5 to +40 degrees as the range to apply in, so not in a freezing bathroom.
A bath edge rarely uses a whole cartridge. A screw-on cap in place of the nozzle keeps the rest usable, and keeping an opened tube from setting covers how long that buys you. If you would rather pay someone, what a reseal costs is on its own page.
When the gap is too wide, or too narrow, for a bead
A bath maker and the sealant makers do not agree on the joint, and nobody tells you.
| Document | Narrowest joint | Widest joint | Depth |
|---|---|---|---|
| Ideal Standard | Leaves a 3-4 mm gap for sealant | Not stated | Not stated. A sealing strip is its alternative |
| DOWSIL 785 Sanitary Acetoxy Silicone | 6 mm | Not stated | 6 mm deep for joints 6-12 mm wide; 2:1 width to depth above 12 mm |
| Sika Sanisil | 5 mm | 25 mm | No more than half the width |
| Soudal Trade Sanitary Silicone | 5 mm | 30 mm | At least 5 mm; width twice the depth |
| Bostik SX Premium Sanitary Silicone | Not stated | Not stated | In deep joints, half the width, using foam or backer rod |
Sources: Ideal Standard's acrylic shower bath instructions and the Dow, Sika, Soudal and Bostik data sheets, read in October 2026.
The bath maker leaves 3-4 mm. The sealant makers set their minimum at 5 or 6 mm. So a bath fitted to its own instructions can have a joint narrower than the sealant on the shelf is rated for. Seal what is there. Raking a sound tiled edge wider to suit a data sheet is a bigger job than the one you started.
A wide joint is the one that goes wrong. One forum poster found a half-inch gap round the bath stuffed with newspaper. The sheets say the depth should be no more than half the width, with backer rod or expanding foam pushed in behind to set it. Dow names closed cell polyethylene backer rod, and says it also prevents the three-sided adhesion Sika warns about. Past 25 mm (Sika) or 30 mm (Soudal) you are outside what those sealants are made for. Ideal Standard's alternative for the bath to wall joint is an extruded sealing strip.
And a gap that has opened up since the bath went in is telling you the bath has moved. Filling it does not stop that.
About this resource
The water-in-the-bath instructions come from the fitting guides of Heritage Bathrooms, Kaldewei, Duravit and Ideal Standard, and from the Everbuild and Bostik data sheets. The cure rates and joint limits come from the Dow, Sika, Soudal, Everbuild and Bostik data sheets. The insurance cases are Financial Ombudsman Service final decisions, cited by reference number so you can read each one. Every document is linked below.
No sealant brand is recommended here, and the data sheets are quoted for what they say about the job. This site does not survey, treat or quote for work. It cannot tell you what is happening in your building.
Common questions
Can I reseal my bath myself?
Yes. It is an afternoon's work plus the time the sealant takes to cure, and the only tools are a knife or scraper for the old bead, a cleaner, masking tape, a gun and a cartridge of sanitary silicone. What decides whether it lasts is the prep and the water in the bath, not skill with the gun. Pay someone if there is already a stain on the ceiling below, because then the job is finding the leak first.
Can you seal a bath over old sealant?
No. The sealant data sheets ask for old sealant and mastic joints to be removed before application, and for the surface to be clean, dry, sound and grease-free. A new bead laid over an old one is stuck to the old one, and the old one is the thing that already let go.
Do you need to fill the bath when resealing?
Yes, though the makers differ on how full. Heritage Bathrooms says seal with the bath full of water. Everbuild and Bostik say half full, because it gives the mid point of the movement the joint will see. Kaldewei says the bath must be weighed down. If you still have your bath's fitting instructions, follow those.
How long do I leave water in the bath after sealing?
Until the sealant has cured, which is how every maker read for this page puts it, and none of them gives a number of hours. The data sheets measure the cure in millimetres a day, about 2 to 3 mm in 24 hours at 23 degrees, and Dow's figures show it slowing after the first day. A thin bead can be through in a day. A thick one in a wide gap takes longer, so check the bead is firm all the way through before you pull the plug.
When should you not use silicone sealant?
When the joint is outside the range it is made for. The sanitary silicone data sheets set a minimum joint width of 5 or 6 mm and a maximum of 25 to 30 mm, with the depth no more than half the width. Past the top of that range, fill behind it with backer rod or foam, or use a sealing strip, which is the alternative Ideal Standard gives for the bath to wall joint.
Sources (15)
- Heritage Bathrooms, Installation Guide, Fitted Baths (Acrylic and Cast Iron), read 6 October 2026
- Kaldewei, Warranty passport, care instructions and installation specifications (2026, GB), read 6 October 2026
- Duravit, Mounting instructions, Bathtub, alcove version with tiled edge, read 6 October 2026
- Ideal Standard, Concept / Connect Air / Alchemy Acrylic Shower Bath installation instructions, read 6 October 2026
- Everbuild (Sika Ltd), Forever White product data sheet, November 2018, read 6 October 2026
- Bostik, SX Premium Sanitary Silicone technical data sheet, 23 September 2026, read 6 October 2026
- Dow, DOWSIL 785 Sanitary Acetoxy Silicone technical data sheet, read 6 October 2026
- Sika, Sanisil product data sheet, November 2019, read 6 October 2026
- Soudal, Trade Sanitary Silicone technical data sheet, revision 24/06/2022, read 6 October 2026
- Financial Ombudsman Service, final decision DRN-4550974 (19 February 2024), read 6 October 2026
- Financial Ombudsman Service, final decision DRN-5184259 (4 April 2025), read 6 October 2026
- Financial Ombudsman Service, final decision DRN-5275936 (14 March 2025), read 6 October 2026
- Financial Ombudsman Service, final decision DRN-5064862 (17 December 2024), read 6 October 2026
- Financial Ombudsman Service, final decision DRN-4358422 (25 October 2023), read 6 October 2026
- Financial Ombudsman Service, final decision DRN-3505502 (13 July 2022), read 6 October 2026